HOW TO
ADD ITEMS

WATCH
OUR VIDEO
Learn how to add items with this short video, or get in touch with us if you need more help.
AN
OVERVIEW
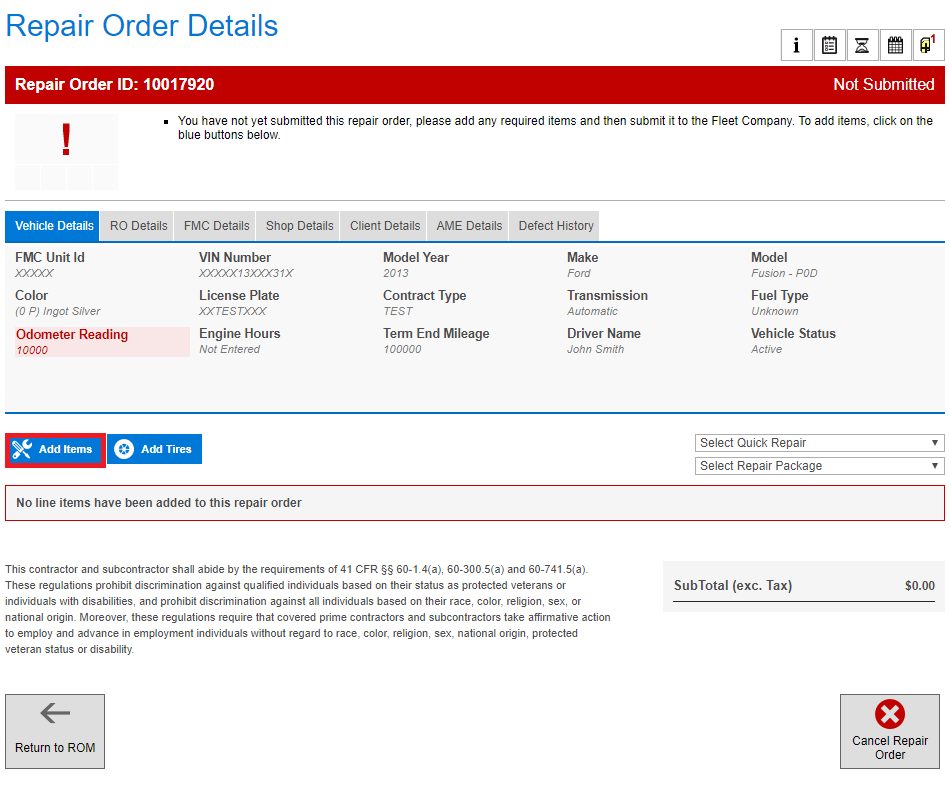
How to add items in Auto Integrate has been updated to make the addition of multiple items to a Repair Order more efficient. To begin, simply click ‘Add Items’.

SEARCHING
LINE ITEMS
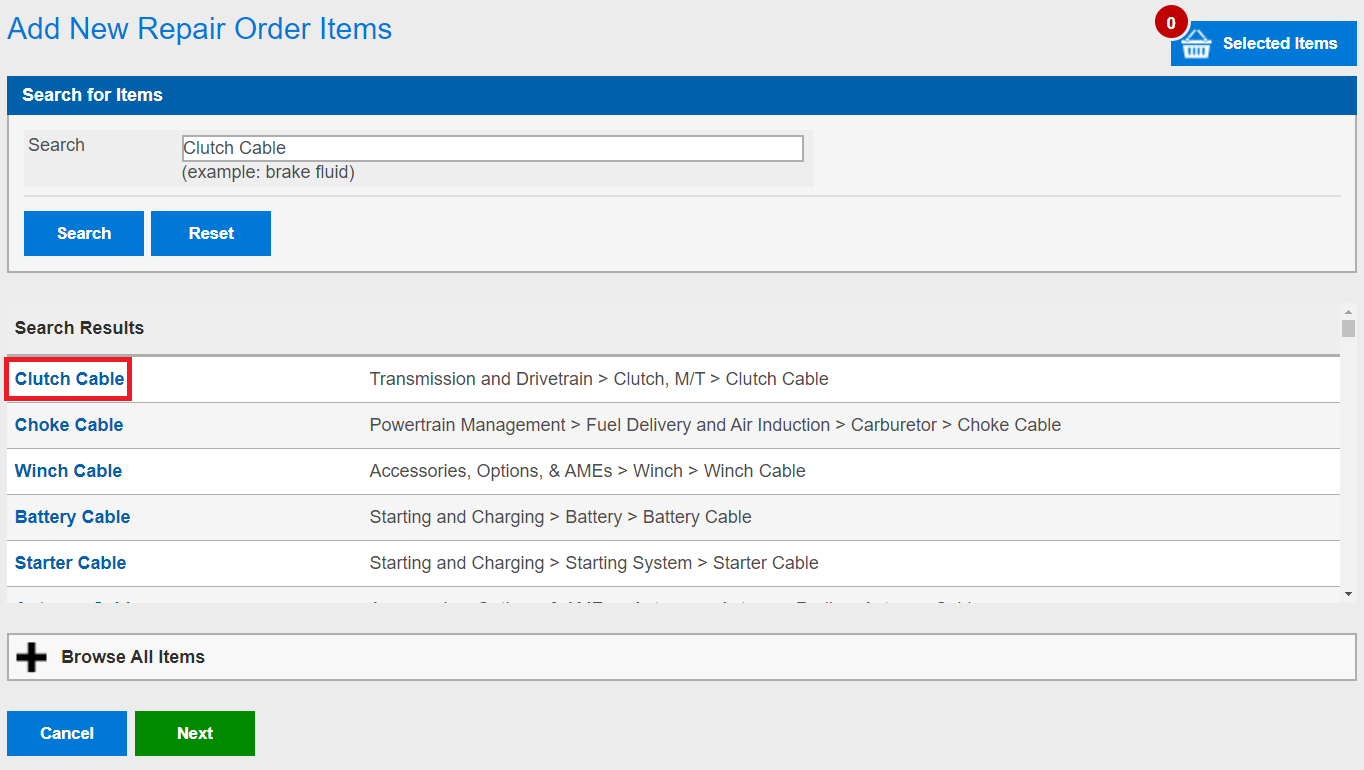
Next, search for the Line item you want to add to the Repair Order. If you do not find what you are searching for the first time, try other words within the description. For example, if you are searching for ‘Intake Manifold Gasket’ try just searching for ‘Gasket’.
SELECTING
YOUR ITEMS
Once you have found the Line item you want to add to the Repair Order, click on the name of the item highlighted in blue to confirm.
SELECTING
ITEM TYPES
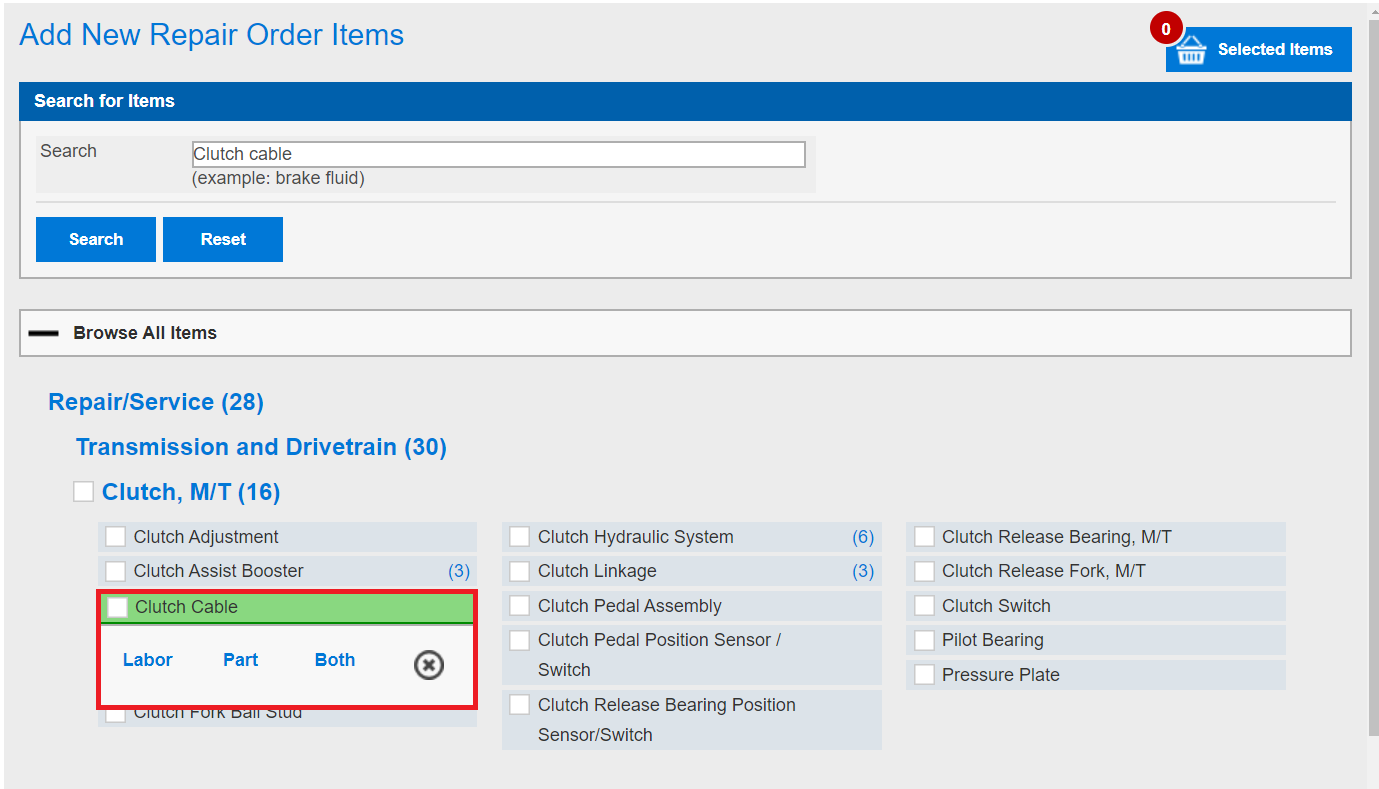
Next, you will see your selected item highlighted in green along with a drop down box prompting you to select if you want to add a: ‘Labor’, ‘Part’, ‘Both’ or ‘Fee’ (if applicable to the Item) line item(s). Select the relevant option for you or to cancel adding the item, press the ‘X’ icon.
ADDING
TO THE BASKET
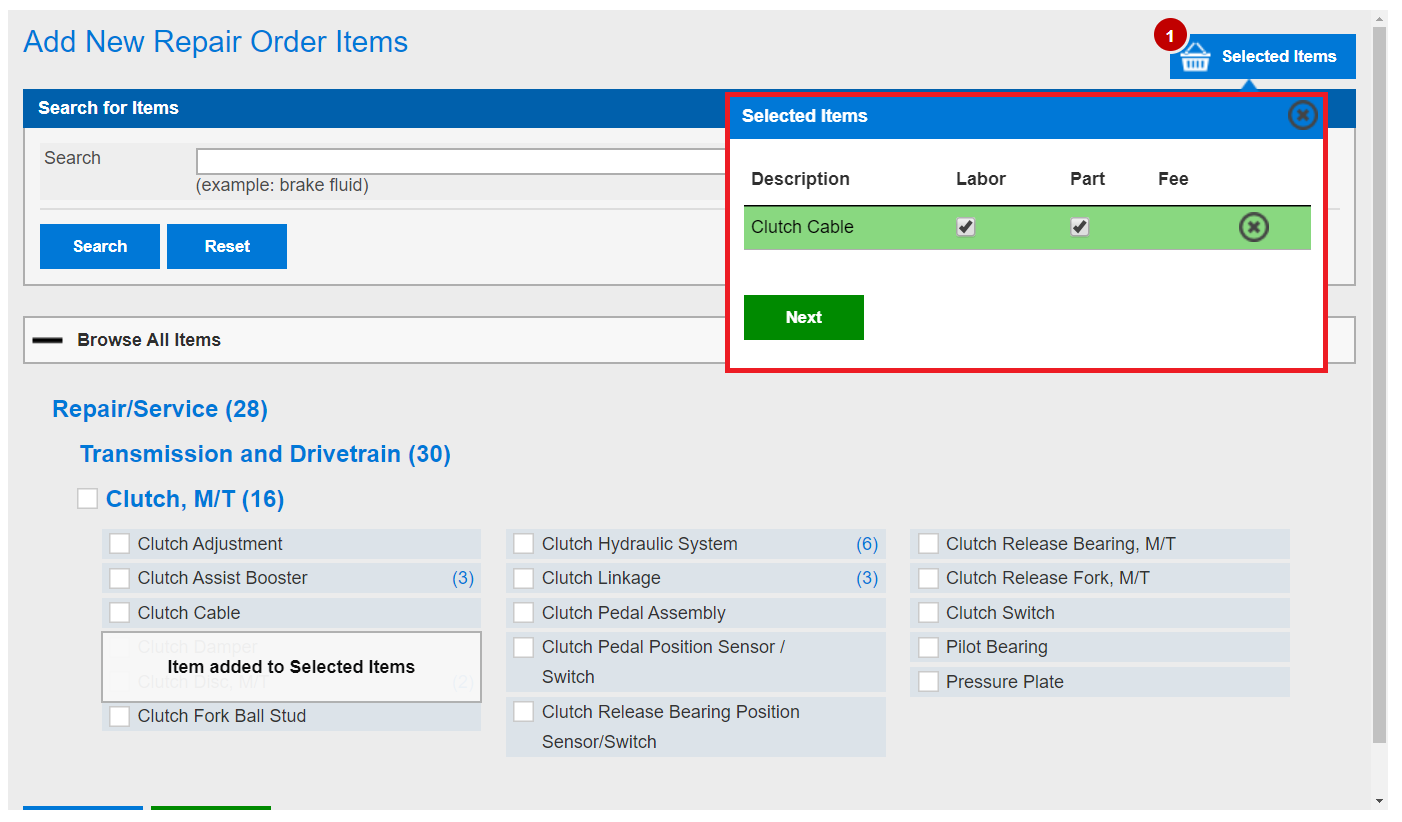
Once you have selected the correct Item Type(s) to add, you will see your item added to the ‘Selected Items’ panel highlighted in green along with a confirmation message appearing. You can then go ahead to add anymore Line items you need.
CONFIGURING
ITEM TYPES
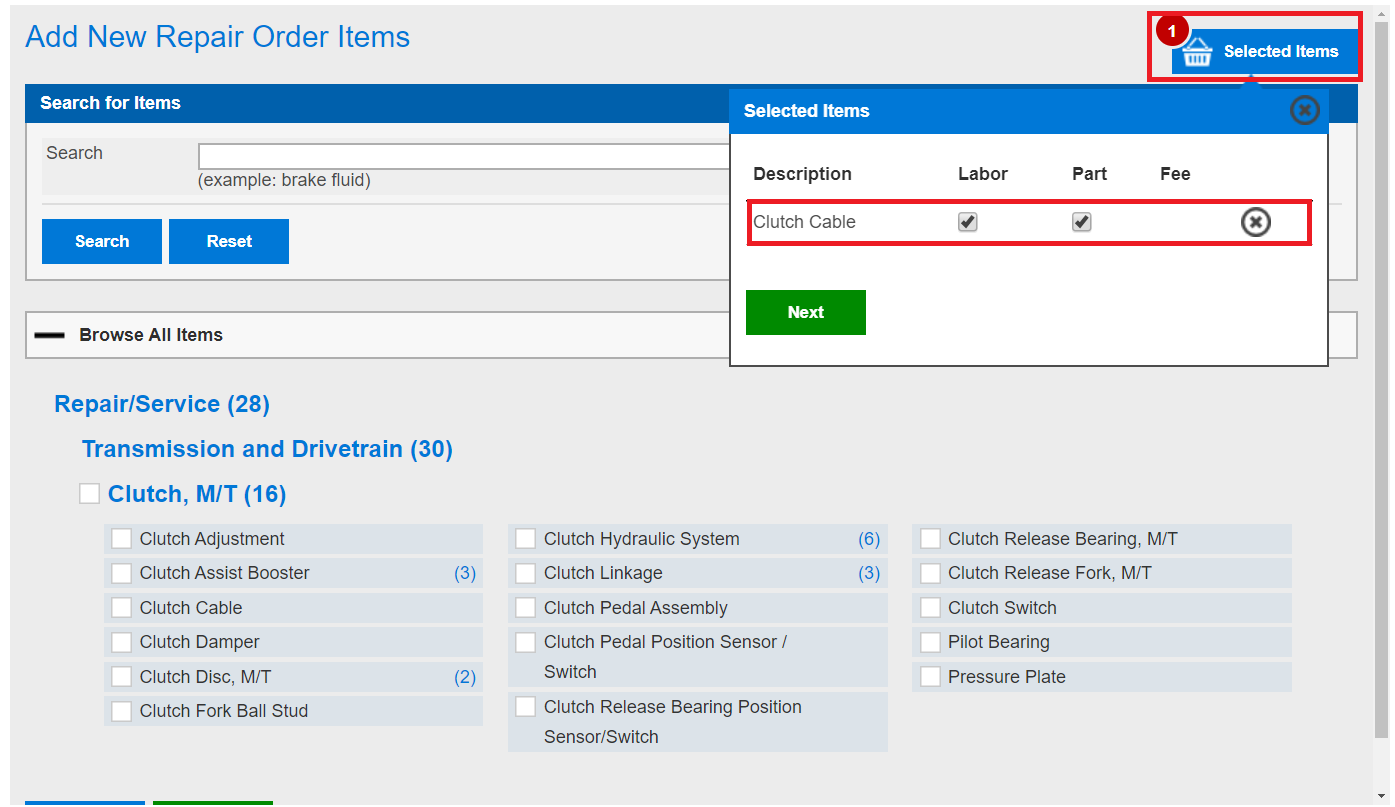
You are also able to configure what Item Types apply to the Line item after adding them to the basket. Simply click the ‘Selected Items’ button and tick/un-tick the relevant check box under each Item Type or remove the Item completely by pressing the ‘X’ icon to the right hand side of the corresponding Item. Once you are happy with the Items in your basket, press ‘Next’ to continue.
ADDING
ITEM DETAILS
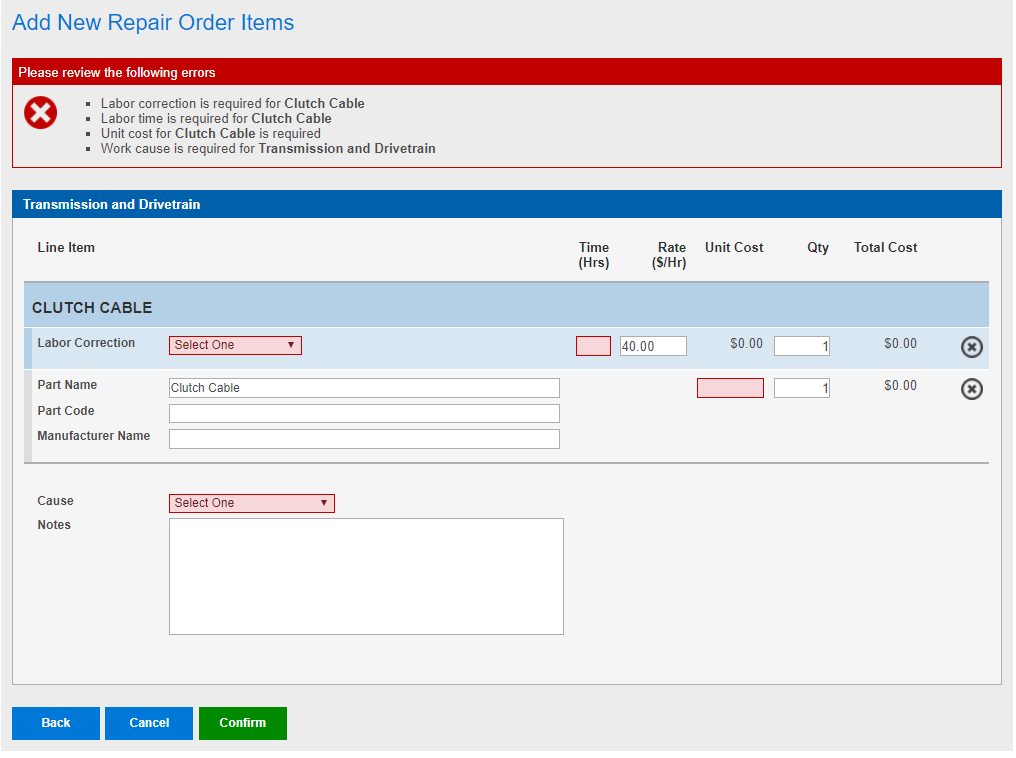
The ‘Add New Repair Order Items’ screen is where you add detail for the Line Items. A ‘Cause’ drop-down box and ‘Notes’ text box are provided to show observations and offer an explanation to the FMC for the work being carried out. Be sure to provide as much as detail as possible to the FMC. Finally, press ‘Confirm’ to add Items to the Repair Order, any fields you may have missed that are required will be highlighted in red along with an explanation at the top of the page.
NEED
MORE HELP?
Use our User Guide to have an overview of the system or contact our support team

